
Makes 1 Swiss roll | |
|---|---|
| Ingredients | Amounts |
| Egg whites | 4 |
| Egg yolks | 4 |
| Sugar | 1 cup |
| Cake flour | 1 cup |
| Baking powder | 1 tsp |
| Cold water | 4 tbsp |
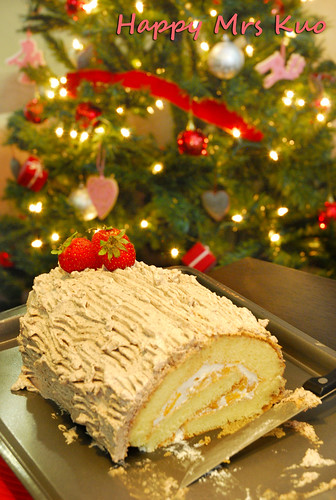
Inner Cream: Whipping cream and diced peaches
Outer glaze: Melted semi-sweet chocolate and Whipping cream
( The above are based on personal estimation)
- In a bowl, whisk the egg yolks and sugar together. When the combination turns pale yellow, add in the cold water.
- Sift the flour and baking powder. Add the flour mixture to the batter and blend well.
- In another bowl, whisk up the egg whites till stiff. Add the egg whites to the cake batter and fold in gently.
- Pour the ready batter onto a flat pan layered with grease-proof paper and bring to bake at 160 degree Celsius for 20 mins or when stick comes out dry when poked.
- Allow the cake to cool before you starts to roll up. Spread the cake with whipping cream and topped with diced peachers. With both hands, roll up the cake carefully.
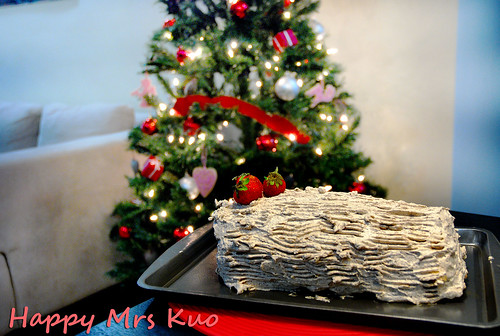
- Apply the chocolate glaze onto the whole cake. Using a fork, line the glaze.
- Chill the cake in the fridge for at least 30 mins before serving.
Well, actutally it wasn't suppose to be a log cake in the first place. I was thinking of making a Peach swiss roll but because the cake cracked, I had no choice but to cover the "Damages" with chocolate glaze.
I only have myself to blame for cracking the cake! Firstly, the cake base wasn't suitable to be rolled up because it's very thick but because I'm so lazy to flip through my swiss roll recipes, I decided to try it out using the Sponge cake recipe. I wouldn't say it's 100% not suitable for swiss roll but rather, I think some adjustments in the recipe is required before converting it to a swiss roll. I would suggest adding in some milk and oil. I am lazy on weekends. What to do?
AND so, because my cake base cracked and I have already prepared the inner creaming, I had to pray hard that the chocolate glaze could fully support my awful looking cracked cake base. I was shivering while applying the chocolate glaze. I'M SO AFRAID OF DESTROYING IT! Luckily, I was gentle to enough and the log cake was done.
The kitchen was horrible after that painful glazing. I had to clean up the table top thrice because the whipped cream dripped all over when I hand-whipped it. Phew, what a relief when I saw the cake "safe and sound" after fridging it for 30 mins. My hard work was paid off! It wasn't so bad afterall. The chocolate glaze was nice even though some of the chocolate got burnt. I was so hungry after all the baking and cleaning up and couldn't wait to eat up my cake. Before my Royal Prince Charming start the "gobbling session", I hastily sliced up a portion for myself. *Evil grin*
It's been quite some times since I used my DIY Photoshooting tent. My Royal Prince Charming complained that I should learnt to take pictures in a more natural way and not to rely on the DIY tent for the Visual effects. Well, since he is my Photoshot Guru aka Photographer, I had to listen to him. NO TENT NO TENT NO TENT! Anyway, I still love these pictures because of my Christmas tree. It just make the whole atmosphere smell so Christmas! Hohoho~


No comments:
Post a Comment